- The Signal by RPN
- Posts
- Tutorial: Dolly Zoom AI Transition
Tutorial: Dolly Zoom AI Transition
How to create a dolly zoom transition between two different shots with AI
Roberto Nickson
January 31, 2026
If you’re reading this, you probably came from my Instagram Reel tutorial on how to create a dolly zoom transition with AI.
Let’s go through the process.
Today, we’re going to be using Artlist.
Step 1:
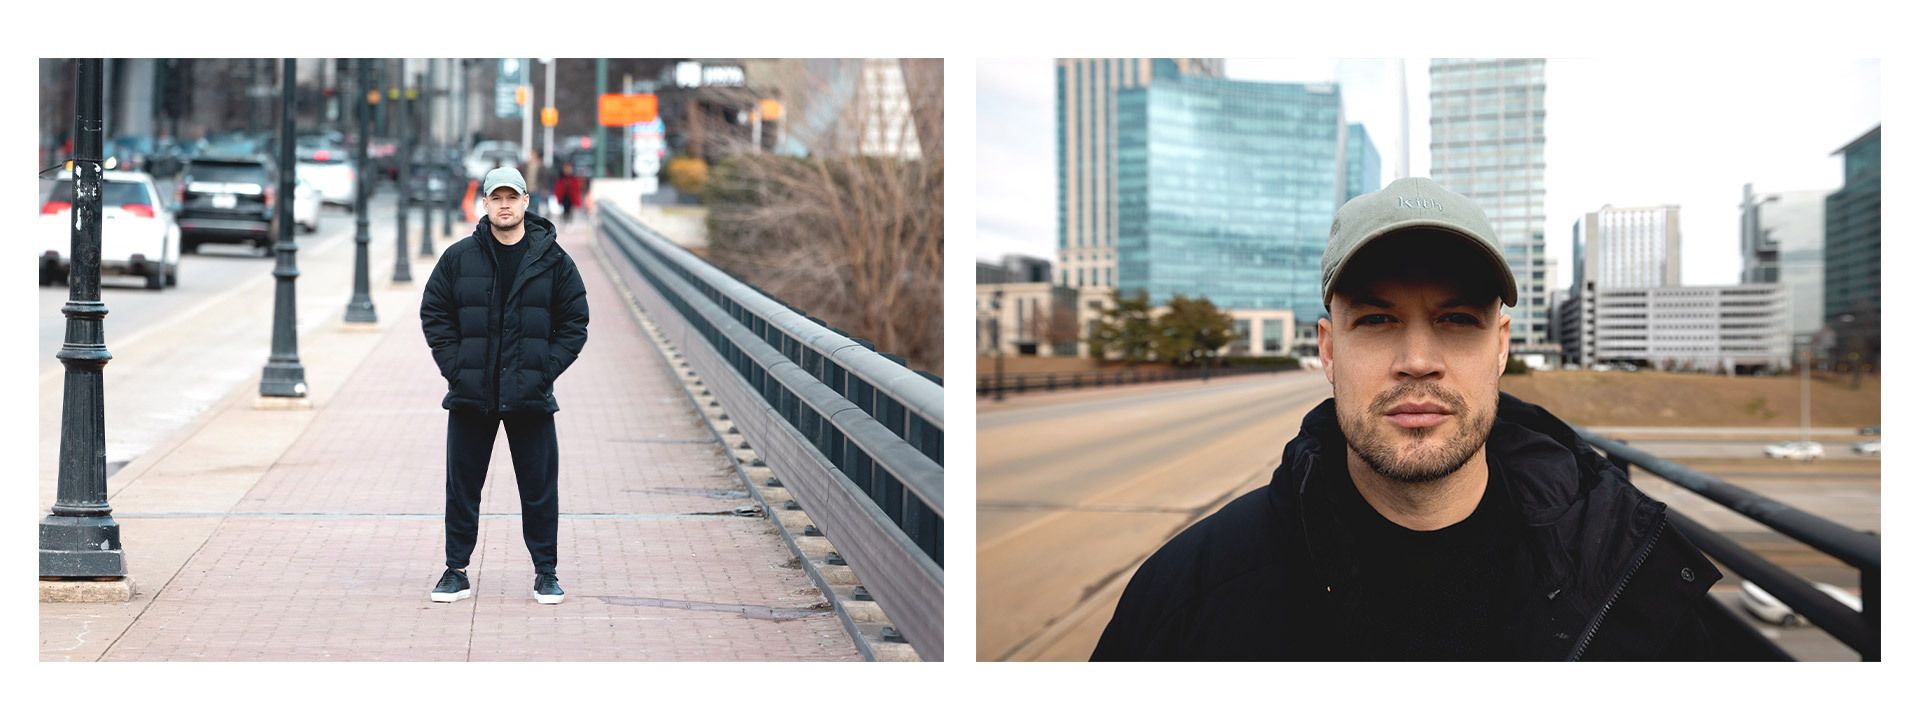
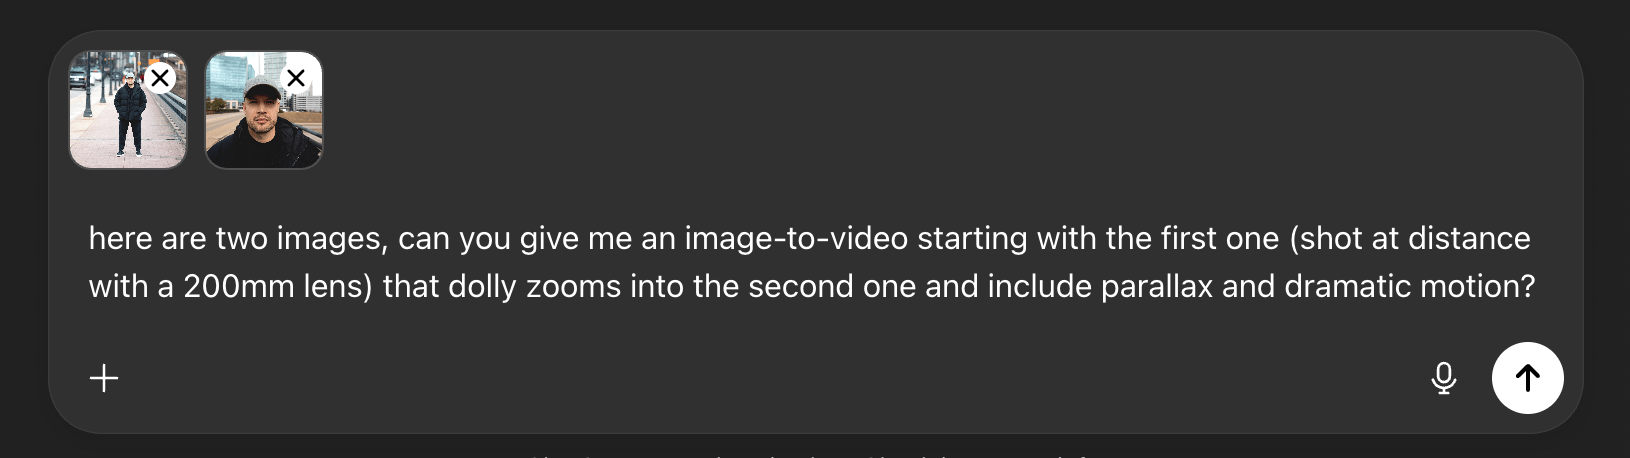
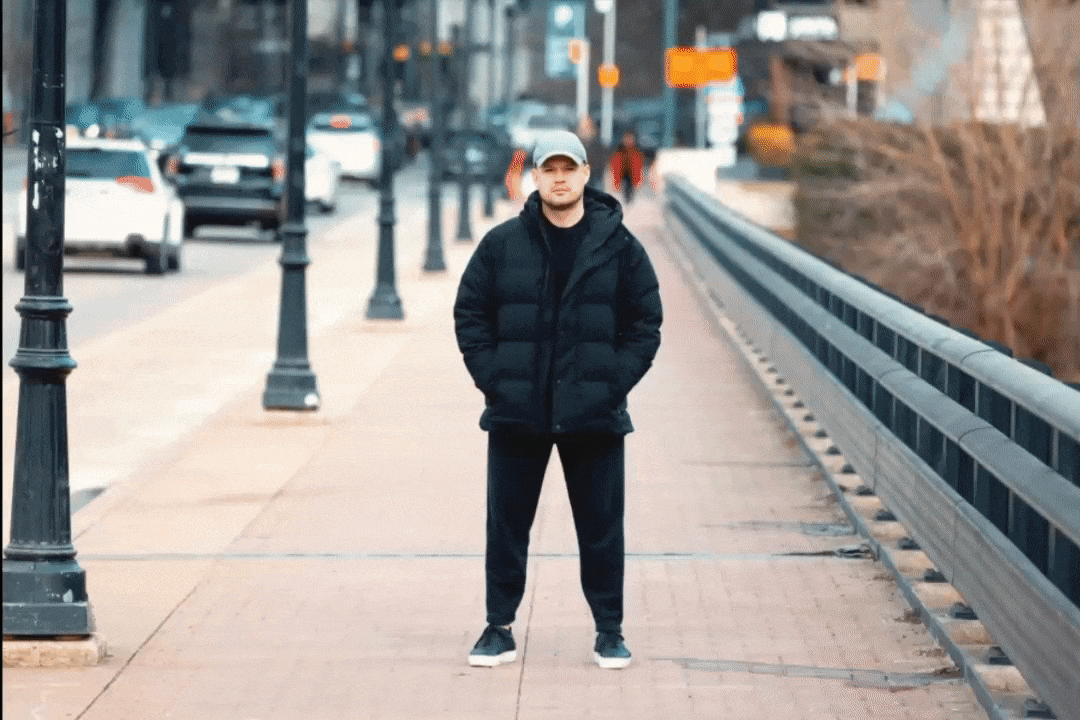
You’ll need two shots for this transition: a start frame, and an end frame.
I took the first shot at distance at a 200MM focal length, and the second shot up close at a 15MM focal length. The greater the contrast in compression, the more dramatic the effect.
Alternatively, you could generate your desired visuals as well with Artlist’s new Original Image model, which was built specifically for cinema-grade visuals.
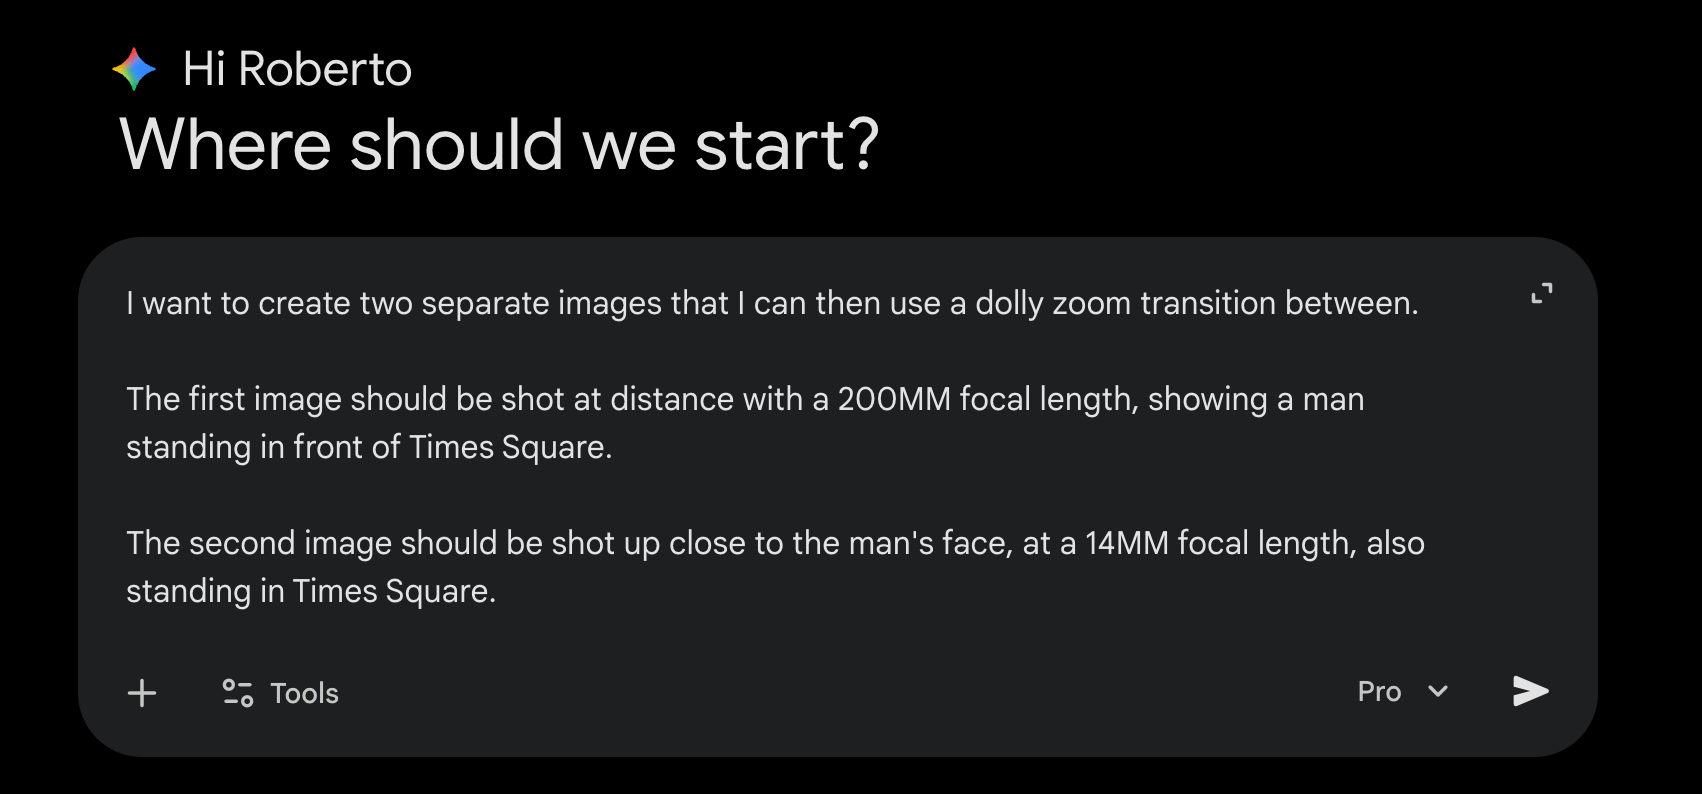
Tip: ask your favorite LLM to give you two distinct text-to-image prompts by describing what you’re looking for:
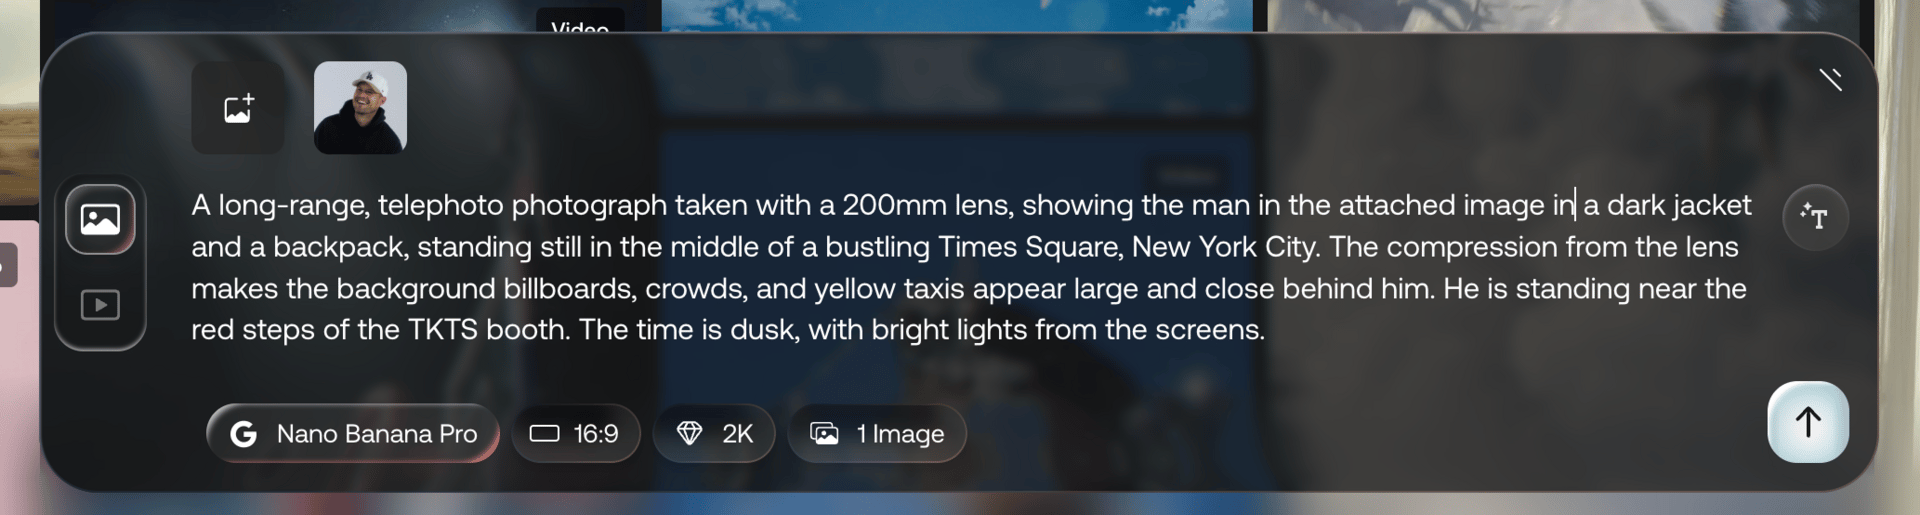
Then, select Artlist’s Original Image model and enter your prompt, or use Nano Banana Pro to add a reference image of yourself.
Step 2:
Once you have your images, choose “Generate Video,” select Kling 2.5 Turbo from the list of models, and enter this prompt.

Here is the prompt that I used:
Generate a cinematic AI video transition starting from Image 1.

Begin on Image 1:
– compressed 200mm telephoto perspective
– full-body framing of the subject
– flattened background with minimal parallax
– subject centered, stable, and sharp

Initiate a slow push-in that accelerates into a dramatic speed ramp:
– camera physically dollies forward, not a digital zoom
– subject grows larger in frame gradually
– background separation increases over time
– depth slowly re-emerges as perspective begins to widen
– motion follows a non-linear acceleration curve (controlled → aggressive → smooth)

Mid-transition:
– peak speed moment with natural motion blur
– background begins to expand outward
– parallax becomes visible and dynamic
– subject remains locked, no facial distortion
– no warping of body proportions or environment

Final phase:
– perspective transitions into an ultra-wide 15mm look
– rapid spatial expansion and depth reveal
– strong parallax and environmental scale
– camera settles into a close-up framing

Resolve into Image 2:
– wide 15mm perspective
– close-up of the subject’s face
– deep environmental context
– crisp focus and complete motion stabilization

Style and constraints:
– photorealistic
– realistic camera physics
– no morphing or face warping
– no AI artifacts
– natural cinematic motion blur only during peak acceleration
– sharp focus at beginning and end

The transition should feel like space unfolding toward the viewer as the camera rushes forward, not a simple zoom-in.
Tip: to get a prompt specific to your needs, use the same LLM trick as above.
Step 3:
Voila!
You now have a really slick visual to use in your videos.
I recommend generating as many as possible so you have different options to choose from.
You can now speed ramp (if you wish) and add sound effects in your favorite video editor.
Thank you to Artlist for sponsoring this tutorial.
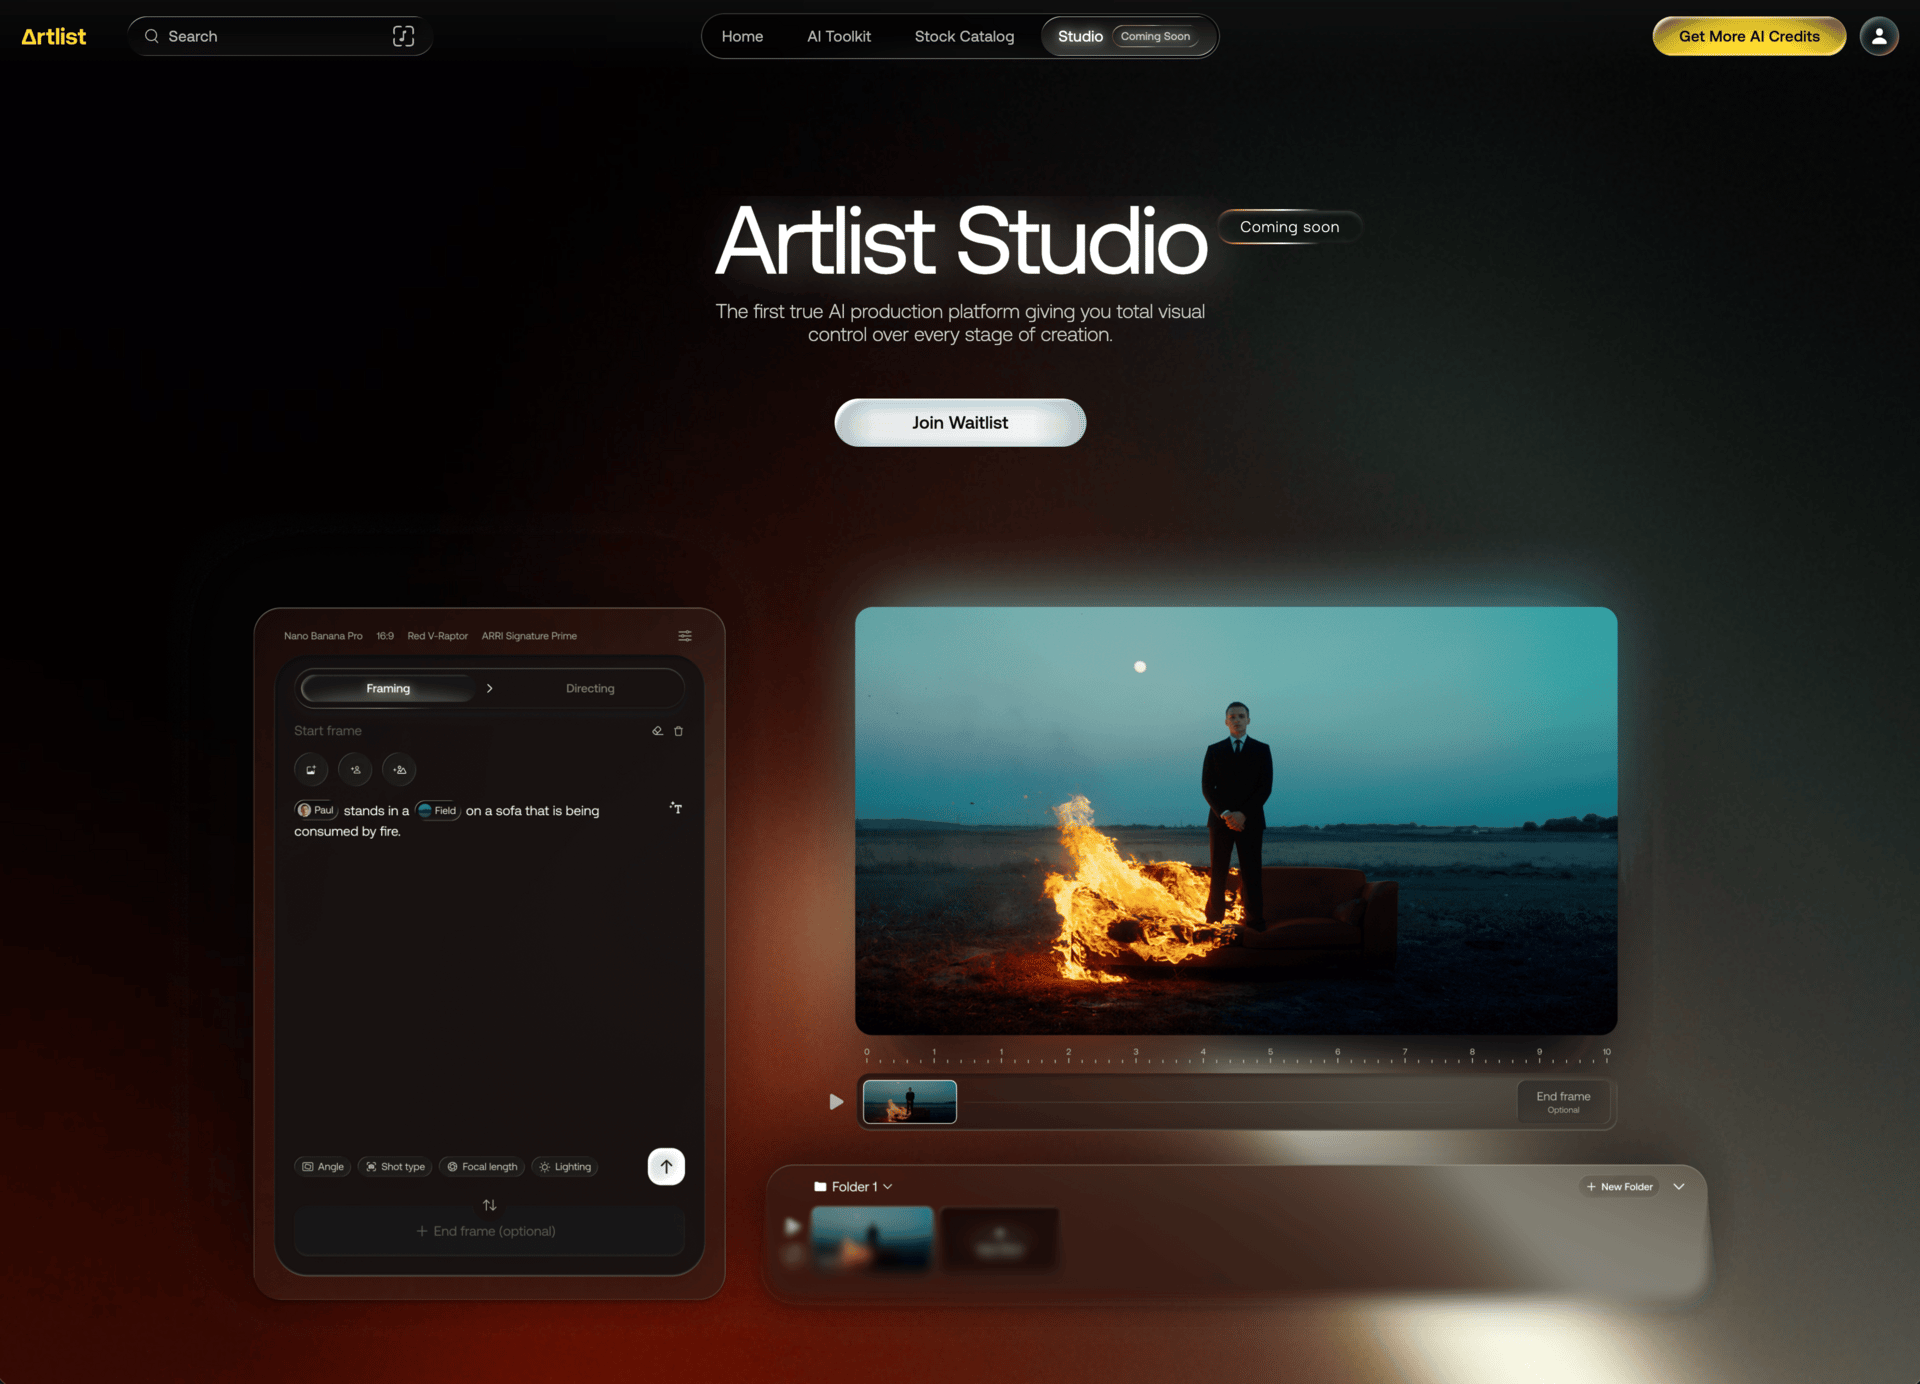
They are about to launch Artlist Studio which will give you precise control over every stage of creation: