- The Signal by RPN
- Posts
- Tutorial: How to Create an Orbit Shot Using Freepik Variations
Tutorial: How to Create an Orbit Shot Using Freepik Variations
This is a great way to present a product on your site or videos.
Roberto Nickson
February 03, 2026
If you’re reading this, you probably came from my Instagram Reel tutorial about how to create multiple variations of the same image with AI, and then use them to create an orbit shot.
This is a really useful way to present a product on your website or in your social videos.
Let’s go through the process.
Today, we’ll be using Freepik.
Step 1:
Open Freepik and select variations from the list of tools.

Step 2:
Add your image, and select all of the different perspectives you want generated as well as the aspect ratio you desire. Hit generate, and you’ll get a bunch of different angles of your original shot.

Step 3:
Once you have your mutliple angles generated, select video generator and use Kling 2.5 as your model. Select your start frame and end frame and enter your prompt.
Remember, sometmies the easiest way to get a detailed prompt tailored exactly to your needs is to simply prompt an LLM for one!

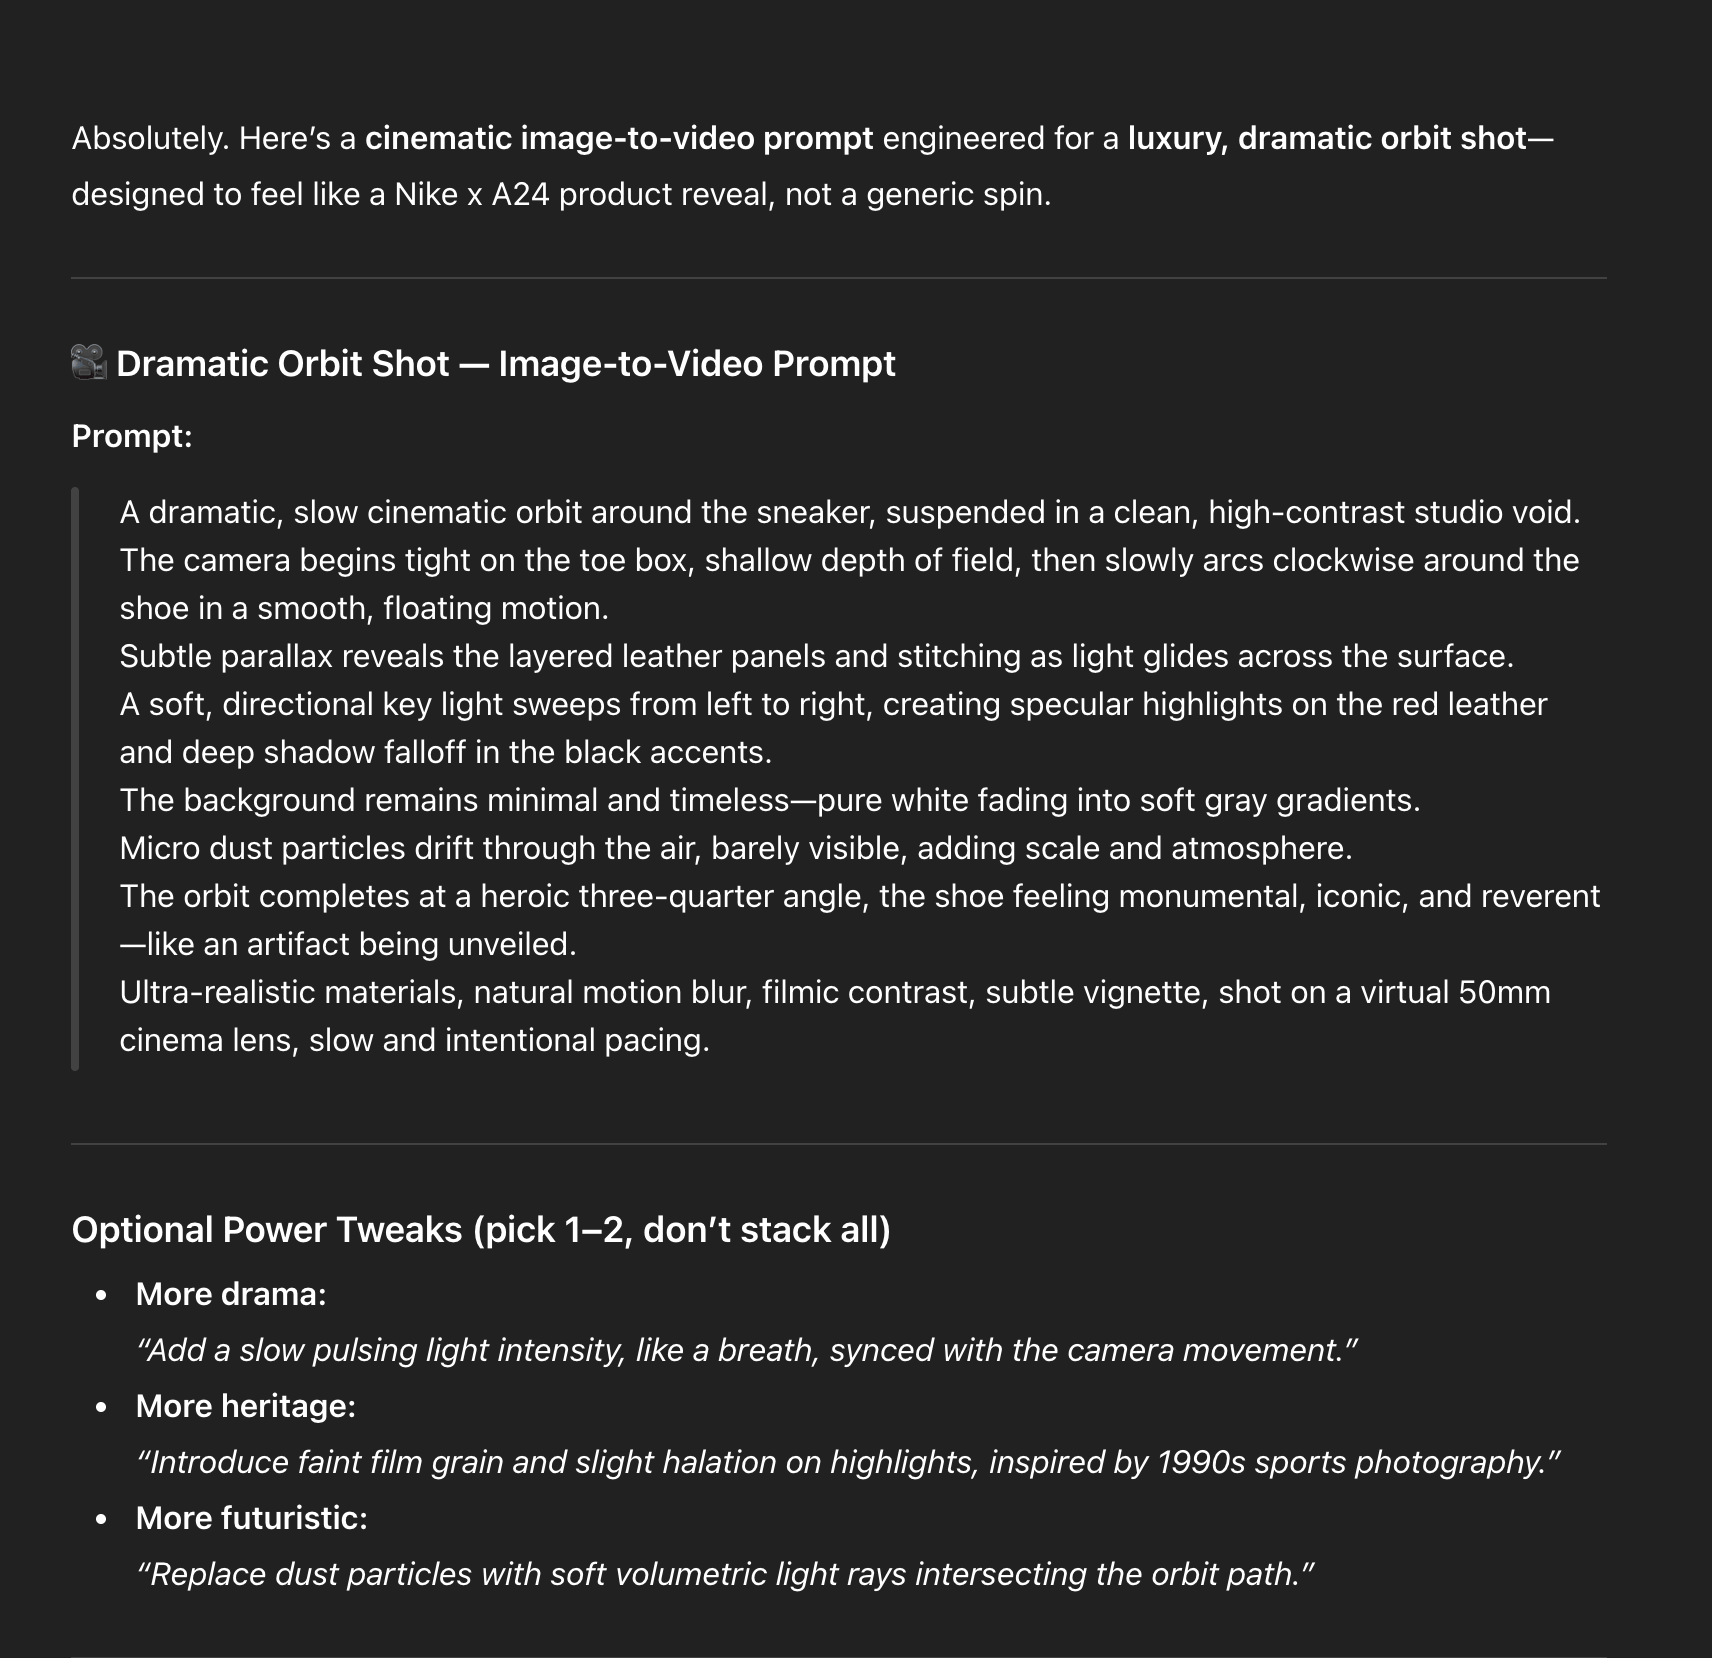
Copy and paste this prompt and hit generate.
A dramatic, slow cinematic orbit around the sneaker, suspended in a clean, high-contrast studio void.
The camera begins tight on the toe box, shallow depth of field, then slowly arcs clockwise around the shoe in a smooth, floating motion.

Subtle parallax reveals the layered leather panels and stitching as light glides across the surface.
A soft, directional key light sweeps from left to right, creating specular highlights on the red leather and deep shadow falloff in the black accents.

The background remains minimal and timeless—pure white fading into soft gray gradients.

Micro dust particles drift through the air, barely visible, adding scale and atmosphere.

The orbit completes at a heroic three-quarter angle, the shoe feeling monumental, iconic, and reverent—like an artifact being unveiled.

Ultra-realistic materials, natural motion blur, filmic contrast, subtle vignette, shot on a virtual 50mm cinema lens, slow and intentional pacing.
Step 4:
You could rinse and repeat this process using the end frame of the previous generation as the start frame of the next.
Then you could stitch the videos in your favorite video editor, speed ramp and sound effects.
